Home gardening basics: How to make seed starting mix and start your own seedlings
Friday, March 03, 2023 by Zoey Sky
http://www.naturalnewstips.com/2023-03-03-home-gardening-seed-starting-mix-start-seedlings.html

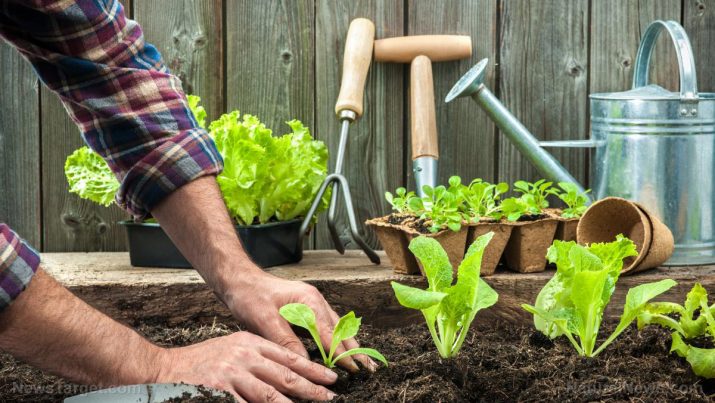
If you want to get a head start on the gardening season but are worried about spending more money, learn how to make a seed starting mix.
Knowing how to start seedlings can also help you get one step closer to a thriving garden without breaking the bank. (h/t to TheOrganicPrepper.com)
Benefits of making your own seed starting mix and starting your own seedlings
If money isn’t an issue or you’re a gardening newbie looking for a convenient option, you can buy supplies like commercial mixes and seedlings at the garden center.
But if you’re worried about going over your budget, you can start your own seedlings. Doing this means you can also choose your preferred varieties.
Although garden centers will offer plant varieties that grow well in your area, they might not have what you’re looking for if you want to try something more exotic. (Related: Home gardening basics: Knowing when to start seeds indoors.)
How to make DIY seed starting mix
Before you make your own seed starting mix, learn about the qualities of a good mix:
Lightness
Having a light starting mix means plant roots can easily grow through it.
This is why experts don’t recommend using garden soil and compost as seed starters themselves. Both are too heavy, but they are a great base for your own starting mix.
Water retention
Seed starting mix with good water retention ensures that tiny roots don’t dry out easily.
You can use either coco coir or leaf mold to ensure that your mix has good water retention.
Drainage
Seed starting mix with proper drainage ensures that plant roots don’t stay too wet and rot.
Use sand, perlite or vermiculite for this purpose. Note that sand will make the mix a bit heavier.
Nutrition
Nutrition ensures that small seedlings have something to grow on. Using compost and leaf mold can help give your seedlings the nutrients they need to grow strong.
There are 10 basic plant nutrients, but many commercial mixes often limit themselves to NPK (nitrogen, phosphorus and potassium).
To make a nutrient-rich seed starting mix, use ingredients like finished animal manure, worm castings or plant food.
Common recipes for DIY seed starting mix are one part drainage material, two parts water retention material, two parts fine-grained compost and 1/2 part nutrition material.
Depending on how much seed starting mix you want to make, you can use basic measuring tools like yogurt cups and ice cream buckets. Use a sieve to break up chunks and a sturdy container with a good lid to keep your seed starting mix in.
Use the three ingredients below in the specified quantities to make a good all-around potting mix for starting seeds. Since all parts are measured by volume, you can use any tool to measure your ingredients. You can get all ingredients at most nurseries and garden stores.
Two parts compost
Use either your own garden compost or buy some. Break up any clumps with your hands or a gardening trowel.
Screen the compost until it has a fine texture. Screening or “sieving” involves running it through a screen made of hardware cloth to separate out any materials that haven’t broken down yet.
The compost will slowly release nutrients into the mix to help feed the seedlings as they grow.
2 parts coir (coconut fiber) or leaf mold
If you are using a block of coir, soak it in water first. This will make it fibrous and easier to pull apart.
You can also use well-rotted leaf mold. Using coir or leaf mold adds bulk to the seed starting mix and helps to retain moisture.
One part perlite
Perlite makes the mix lighter and helps prevent it from becoming too wet. As mentioned previously, you can use sand but the mixture will be heavier.
After measuring all the ingredients, mix them thoroughly.
After preparing a batch of seed starting mix, store it for later use in a lidded container or old potting soil sacks with the top rolled down and secured. Store the mix in a dry, cool place.
How to start seeds
Follow the tips below to learn how to start your own seeds:
Don’t plant seeds too deeply or they won’t sprout
There’s a limited amount of food (endosperm) in the seed and the plant must reach the light to make more food for growth.
Whatever method you use, don’t plant too deeply. Check the seed packet for the appropriate planting depth.
Try using heat mats
Heat mats are affordable and they can help your seeds germinate quickly. You will also benefit from using a heat mat in colder climates.
Start frost-sensitive plants like peppers and tomatoes anywhere from mid-March to April 1, when it’s still around 20 F outside.
Even inside, plants don’t like that cold. Use heat mats to help seeds germinate.
Germinate seeds in a wet paper towel
Make sure you’re planting good seeds by germinating them in a wet paper towel before planting.
With this method, you first wet a paper towel and put some seeds between the layers along with an identifying marker like popsicle sticks or store-bought plant labels. Wrap the paper towel layers in plastic and turn on the heat mat.
Alternatively, you can use flat plastic food containers or a Ziploc bag.
City compost is free, but you don’t always know what’s in it
Some gardeners send their diseased plants to the city compost pile, which may or may not be hot enough to kill organisms that cause diseases. If you use city compost, you may be exposing your plants to diseases.
Don’t try to pasteurize your own mix
The oven method doesn’t always work well, but putting a mushroom mix in an old pillow case and sterilizing it on the stove for one hour is more effective.
You shouldn’t use seed starting mixes to grow plants over the long term
DIY mixes are great for helping plants develop good root systems so the plants will grow quickly once they come in contact with good soil.
Don’t grow your plants in a seed starting mix over the long term. Remember that seedlings are usually transplanted at about eight weeks, including hardening time.
Harden seedlings before transplanting
Seedlings that haven’t been hardened will eventually die.
Plants grown indoors must first be acclimated to direct sun, wind and rain exposure. This is done by keeping them outdoors for increasing amounts of time in one to two weeks.
For example, you can start by leaving a seedling for one hour in direct sun. Do this for two days, then double the exposure time every couple of days until the plants can be left outdoors overnight.
If nighttime temperatures are still 40 F or so, you can benefit from using a collapsible greenhouse. Buy one can make it from a bit of plastic and some PVC. You can also use cold frames.
Wear protective gear
Starting seed mix exposes you to very finely-grained particles that are easily inhaled. Protect yourself from the materials you’re using to make the mix by wearing a mask and working in a well-ventilated area.
Gloves will protect your hands if you are using coco coir and peat moss. Both ingredients are slightly acidic and can hurt your hands.
Use hot water treatment for disease management
If you didn’t buy your seeds, prevent contamination by disease-causing organisms by giving the seeds a hot water treatment.
Save money on your home garden and grow a wider variety of plants by making your own seed starting mix and learning how to start seedlings.
Watch the video below for more tips on how to start seeds.
This video is from the Pop Up Homestead channel on Brighteon.com.
More related stories:
Home gardening tips: How to start tomatoes from seed.
Home gardening tips: How to grow onions from seed.
Seed starting 101: 4 Good reasons to start seeds indoors.
Sources include:
Tagged Under: Tags: green living, home gardening, homesteading, how-to, off grid, organic farming, organics, preparedness, prepper, prepping, seed starting mix, seedlings, survival, sustainable living, tips
RECENT ARTICLES


Home gardening basics: How to make seed starting mix and start your own seedlings
By Zoey Sky

Survival first aid: Basic tips for treating stab wounds
By Olivia Cook

Support healthy blood sugar levels with this delicious sweet potato and pumpkin soup
By Zoey Sky

Cahlen Lee shares tips on how to detoxify dioxins using food and nutrition
By Kevin Hughes
COPYRIGHT © 2017 NATURAL NEWS TIPS


